
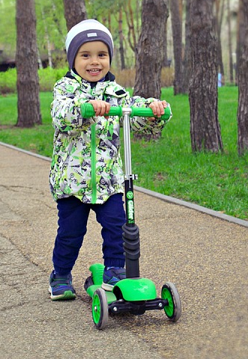
Once you have decided to purchase a scooter for your child, you will need to know how to teach them to ride on it. These are very different from a bicycle which requires balance of a different kind. On a bicycle, once they are up on the seat, they need to maintain perfect balance. A scooter is much easier to learn how to use. Essentially, they will have their hands on the handlebar, and one foot on the scooter itself. The other foot is used to propel the child forward, and can also be used to help them catch their balance. Therefore, it’s not going to be as difficult to teach any child to ride a scooter. Here are 10 simple steps that you can use in order to help your child become proficient on their scooter in just a few days.
Present Them With The Basics
The first step of the process is to show the child the scooter. Allow them to hold it, and explain the different parts of the scooter to them. You need to do this before they ever tried to get on it. This will give them the basic information they need to understand the basic components.
Show Them How To Ride The Scooter
The second step is to show the child how to ride the scooter. This is something that you will demonstrate. You will stand on the scooter with 1 foot to, and with the other push yourself forward. You can also demonstrate how to turn and how to stop.
Begin To Teach Them Indoors
The third step of the process is to show them how to get on the scooter, but this must be done indoors. Preferably, you need to do this on a carpet. They are not going to have their balance initially. If they fall, it’s not going to be as dangerous in comparison to showing them on the concrete outside.
Tell Them To Go Slow
The fourth step of the process is to explain they need to go slow initially. Many kids will want to reach top speeds the first time that they get on. Simply tell them to place 1 foot on the scooter, and push off with the other, perhaps going just a few inches.
Use A Strap To Pull Them Around
The fifth step of the process is to have them get on the scooter while you pull them around. As long as they have both hands on the handlebars, and if both of their feet are on the scooter, they can get their sense of balance.
Teach Them How To Balance On A Scooter
The sixth step is to instruct them on how to maintain their balance. If they already know how to ride a bike, this will just come to them automatically. However, if they do not know how to ride a bike without training wheels, then you need to explain how to maintain their balance. Show them how to put their 1 foot down in case they feel like they are falling. Show them how to stay balanced while standing on 1 foot. These are preliminaries to them actually pushing themselves forward without you having to pull them around.
Take Them Outside
The seventh step of the process is that their initial attempt to get on the scooter outside of the home. If they have been practicing for a few minutes on the carpet, and you think they are ready, you can bring them out to the driveway or sidewalk. It is highly recommended that you stand with them, and also walk or run with them once they get going. Similar to training wheels, this will give them the confidence that they are not going to fall. At some point, they will understand their balance in context with the scooter, and they will not worry at all.
Let Them Ride The Scooter By Themselves
The eighth step of the process is the most nerve-racking for parents. This is where you will not be hovering over them. You will tell them to take their scooter down the street, perhaps 50 feet, and notice what they are doing. If they fall, they will likely get up and it should not be a problem. However, most kids will be able to catch themselves by simply putting their foot down. These are all things they will know how to do based upon the preliminary training that you provided inside of the home.
Provide Them With Advanced Strategies
The ninth step of the process is to show them how to do different things with the scooter. Initially, they will likely go forward and come to a stop. You will want to instruct them on how to slow down, turn, and even turn around.
Go Riding With Them
The final step of the process is to actually go on a ride with them. You can do this on your bike, or if you have a scooter, you can do this as well. You will want to do this side-by-side with them. This is going to show them that using their scooter can actually be a group event. This may actually help breakthrough certain emotional difficulties that they have with meeting new people. They will understand that the scooter might be a great way to meet new friends.
By following these 10 simple steps on how to show your child how to ride a scooter, they will soon be doing this on their own every day. By starting off in the house, and subsequently taking them outside, they will be prepared to go riding on their scooter on their own, or with you, in what could be just a few short hours.
If you liked the article, please leave your feedback.